Hey Developers, today we are going to learn “how to add the google map to the Android studio project”. We will complete this project in the 6 steps, so without any further discussion let’s start building the project.
Page Contents
How to Add the Google Maps in Android Studio (With Example [Step by Step])
Step 1: Download and Install Android Studio
First, Download & Install Android Studio. If you don’t know how to download & install Android Studio, So click this link and read Install & Setup Android Studio, Java JDK & SDK.
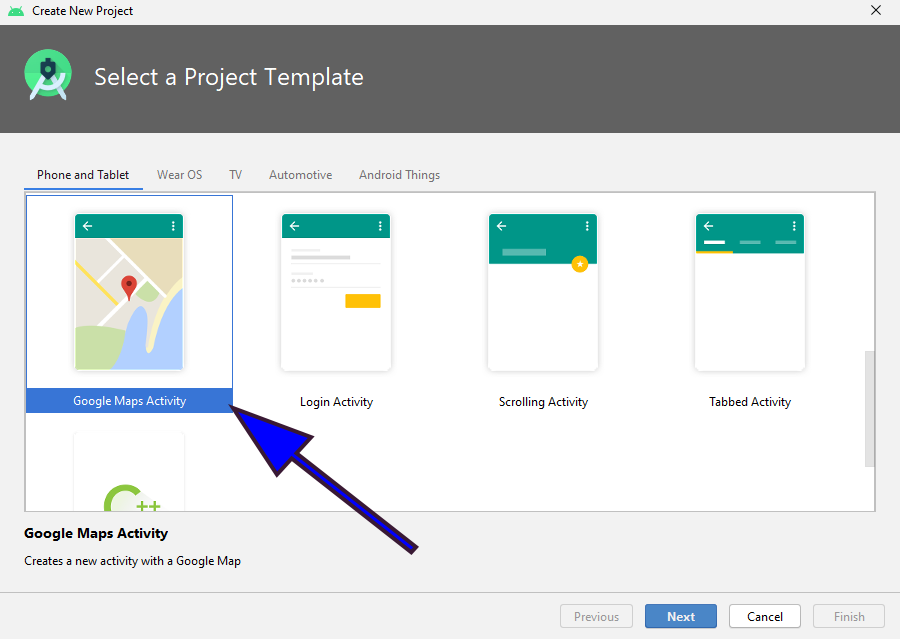
Step 2: Create New Project with Google Map Activity.
1- Start the Android Studio.
2. Create a new project.
3- Choose the project platform. Like Phone and Tablet & more.
4- Select Google Maps Activity, then click Next.
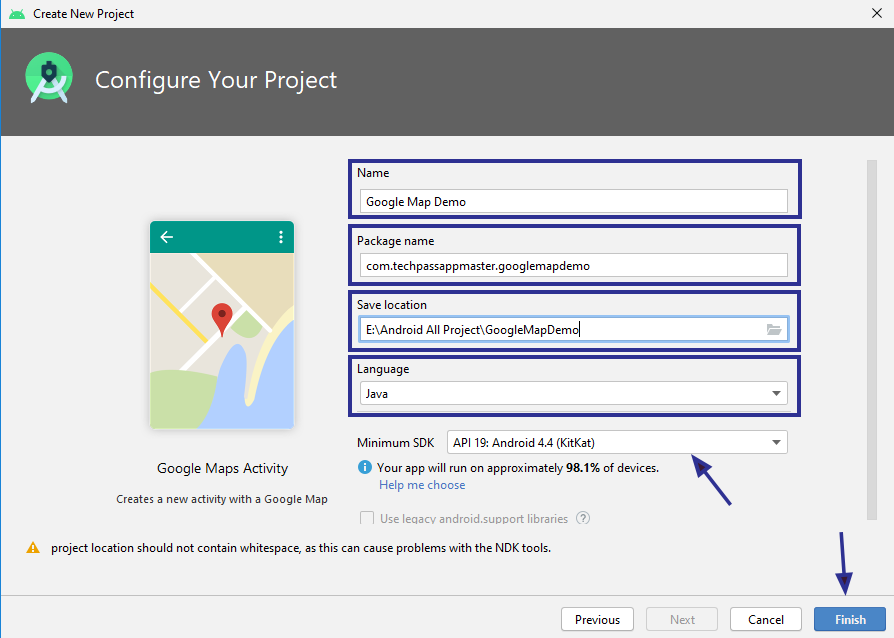
5. Enter the:
- App Name
- Package Name
- Project location
- The select programming language Java or Kotlin and the minimum API level supported by your app.
6- Click Finish.
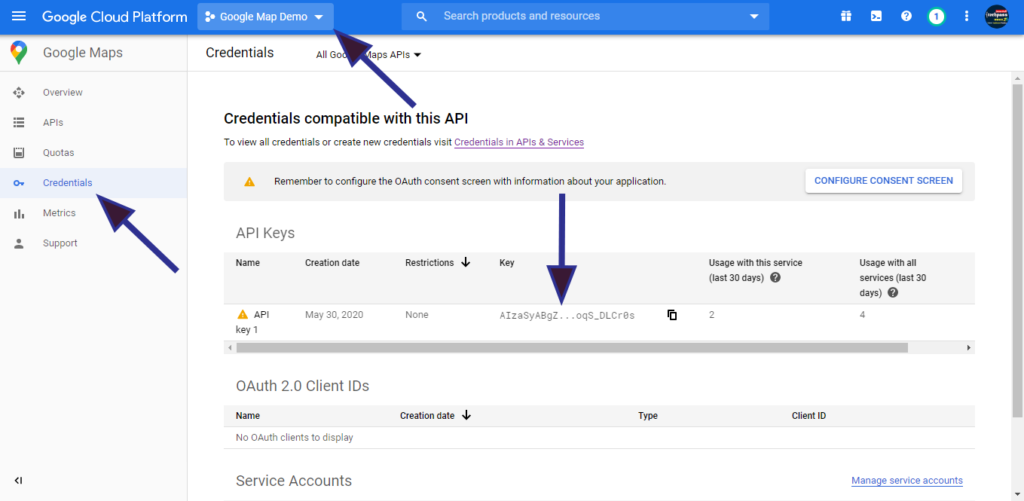
Step 3: Need an API key to access the Google Maps servers
The key is free. So you have to need an API key with restrictions for Android apps. You can use it with any kind of application and it supports an unlimited number of users.
i- Go to the Google Cloud Platform Console.
ii- Create a new project
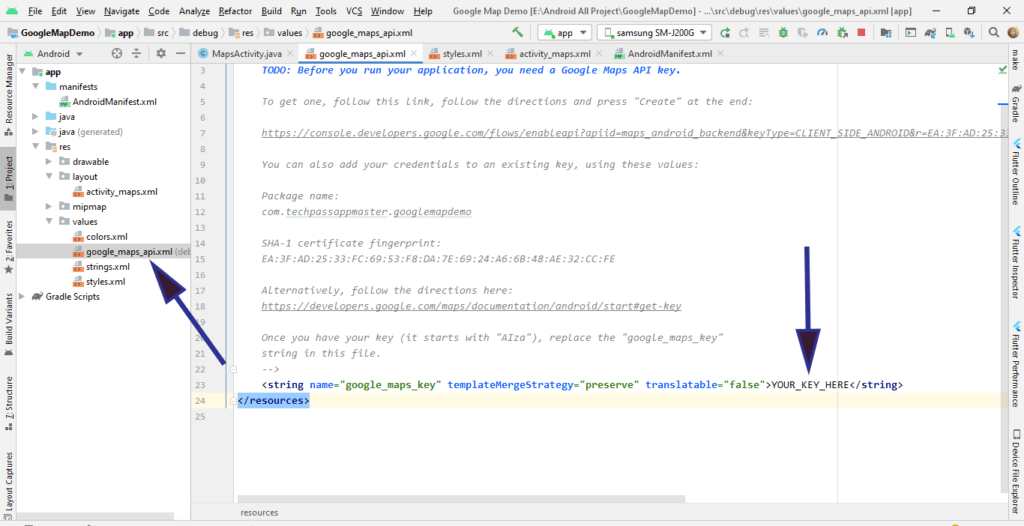
iii-Copy API Key and paste by default create google_maps_api.xml in your project (res/values/google_maps_api.xml).
Step 4: Define internet and location permissions
Now you have to define internet & location permissions in Android Manifest.
 <uses-permission android:name="android.permission.ACCESS_FINE_LOCATION"/>
 <uses-permission android:name="android.permission.INTERNET"/>
AndroidManifest.xml
<?xml version="1.0" encoding="utf-8"?>
<manifest package="com.techpassappmaster.googlemapdemo"
    xmlns:android="http://schemas.android.com/apk/res/android">

    <uses-permission android:name="android.permission.ACCESS_FINE_LOCATION"/>
    <uses-permission android:name="android.permission.INTERNET"/>

<application
        android:allowBackup="true"
        android:icon="@mipmap/ic_launcher"
        android:label="@string/app_name"
        android:supportsRtl="true"
        android:theme="@style/AppTheme">
        <meta-data
            android:name="com.google.android.geo.API_KEY"
            android:value="@string/google_maps_key"/>
        <activity
            android:name="com.techpassappmaster.googlemapdemo.MapsActivity"
            android:label="@string/title_activity_maps">
            <intent-filter>
                <action android:name="android.intent.action.MAIN"/>
                <category android:name="android.intent.category.LAUNCHER"/>
            </intent-filter>
        </activity>
    </application>
</manifest>
Step 5: Define XML code in the Map layout
When we create google Maps activity. The XML file that by default defines the app’s res/layout/activity_maps.xml layout. It contains the following code:
activity_maps.xml
<?xml version="1.0" encoding="utf-8"?>
<fragment
    xmlns:android="http://schemas.android.com/apk/res/android"
    xmlns:map="http://schemas.android.com/apk/res-auto"
    xmlns:tools="http://schemas.android.com/tools"
    android:id="@+id/map"
    android:name="com.google.android.gms.maps.SupportMapFragment"
    android:layout_width="match_parent"
    android:layout_height="match_parent"
    tools:context=".MapsActivity" />
Step 6: Map Activity Java code
Java file that by default defines the maps activity is named MapsActivity.java.
package com.techpassappmaster.googlemapdemo;

import androidx.fragment.app.FragmentActivity;
import android.os.Bundle;
import com.google.android.gms.maps.CameraUpdateFactory;
import com.google.android.gms.maps.GoogleMap;
import com.google.android.gms.maps.OnMapReadyCallback;
import com.google.android.gms.maps.SupportMapFragment;
import com.google.android.gms.maps.model.LatLng;
import com.google.android.gms.maps.model.MarkerOptions;

public class MapsActivity extends FragmentActivity implements OnMapReadyCallback{

    private GoogleMap mMap;

    @Override
    protected void onCreate(Bundle savedInstanceState) {
        super.onCreate(savedInstanceState);
        setContentView(R.layout.activity_maps);

        SupportMapFragment mapFragment = (SupportMapFragment) getSupportFragmentManager()
                .findFragmentById(R.id.map);
        mapFragment.getMapAsync(this);
    }

    @Override
    public void onMapReady(GoogleMap googleMap) {
        mMap = googleMap;
        LatLng new_delhi = new LatLng(28.613939, 77.209023);
        mMap.addMarker(new MarkerOptions().position(new_delhi).title("New Delhi"));
        mMap.moveCamera(CameraUpdateFactory.newLatLng(new_delhi));
    }
}
Step 7: Run & Test App
Click the Run menu option to run your app.
Recommended Reading:
- Android Working With Firebase – Signup And Login Auth.
- Firebase Authentication With Custom User Fields In Android
- What is Kotlin In Android?
- How To Make An Android App For Beginners
- Android Interview Questions For Fresher.
- How To Change Font On Facebook.
- 15 Best Useful Sites For Online Learning.
I hope you liked the post. If you have any questions regarding this post. Feel free to comment and share the post with your friends.
Happy Learning 🙂